Fader layer customization
Behringer made the WING's surface very flexible. It's divided into three bays. The left bay has twelve faders, the center bay has eight faders, and the right bay has four faders. Each bank comes with predefined layers that vaguely correspond with traditional mixing layouts. The left bay is input focussed, the center bay is for busses, matrixes, and DCAs, and the right bay is for mains. All banks additionally have a USER 1 and USER 2 layer that's user-assignable. To edit the assignments, press the VIEW button on the corresponding bank and tap the ASSIGN button with the wrench icon at the top of the main display.
Assigning to default layers
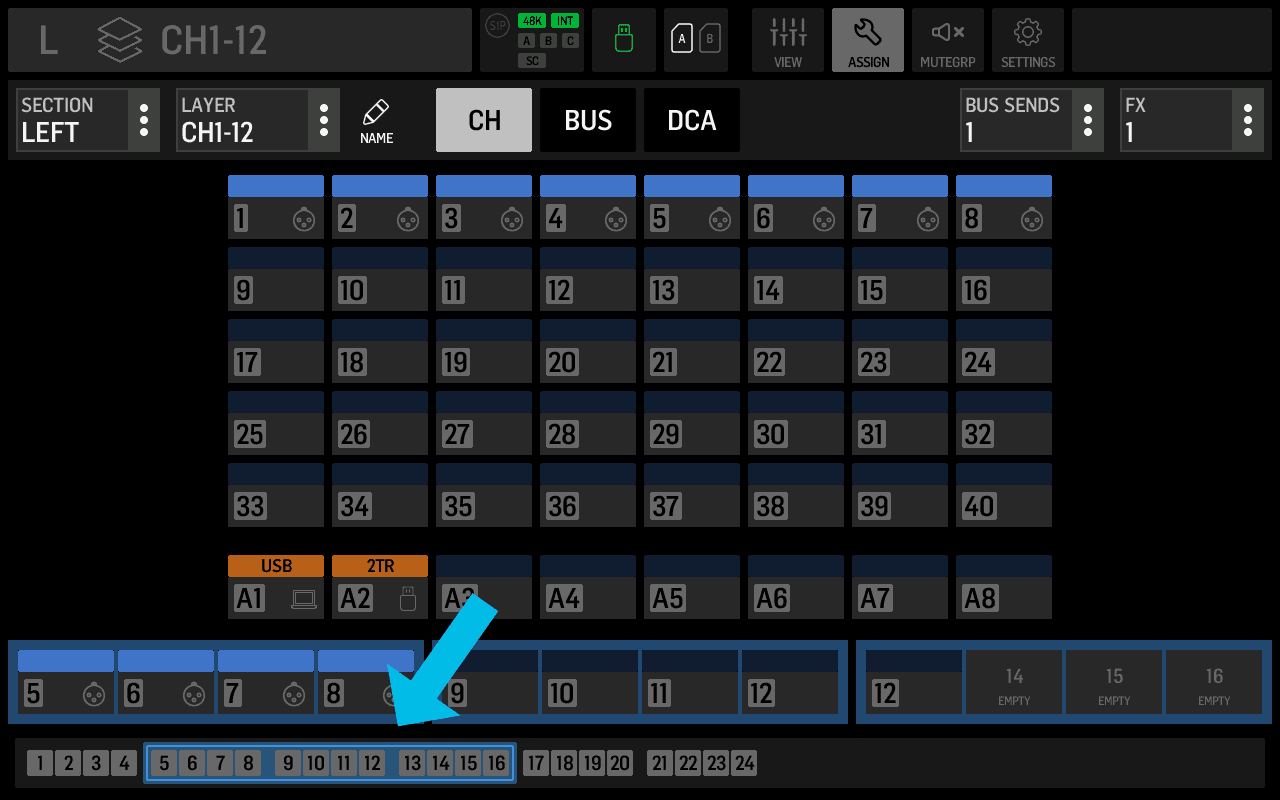
A lesser-known fact about the default layers is that they're entirely user-assignable, just like the USER layers. You can place your busses on the input 1-12 layer, for example.
Pagination on default and user layers
Another non-obvious feature is pagination on USER layers. While the left bank only got twelve physical faders, it has twenty-four assignable slots. You can use the "◀︎ 4" and "4 ▶" buttons to page to those additional slots.

Insert between already assigned faders
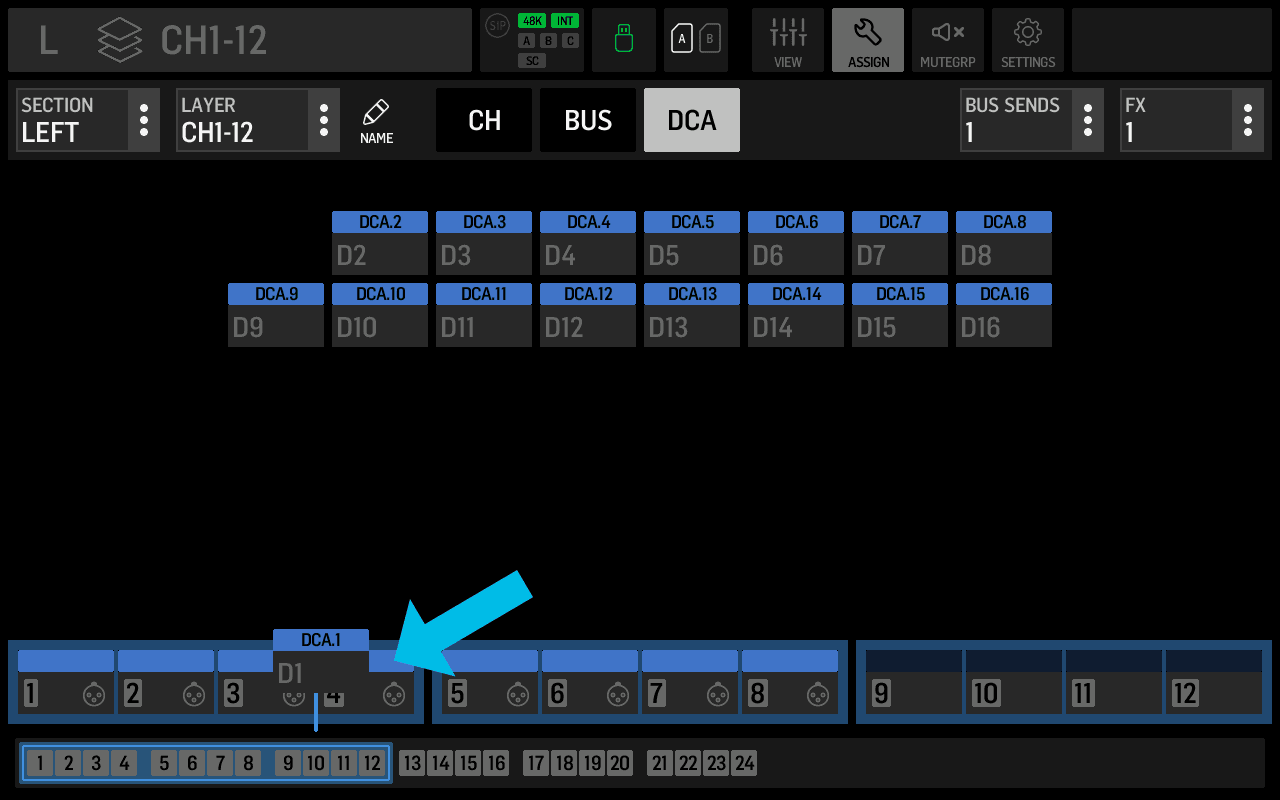
If you don't want to replace an existing assignment and instead insert between them, drag the channel you want to insert between two fader slots until a line appears, then let go. Inserting between two channels will shift all channels on the right of the insertion point.

Assigning bus sends
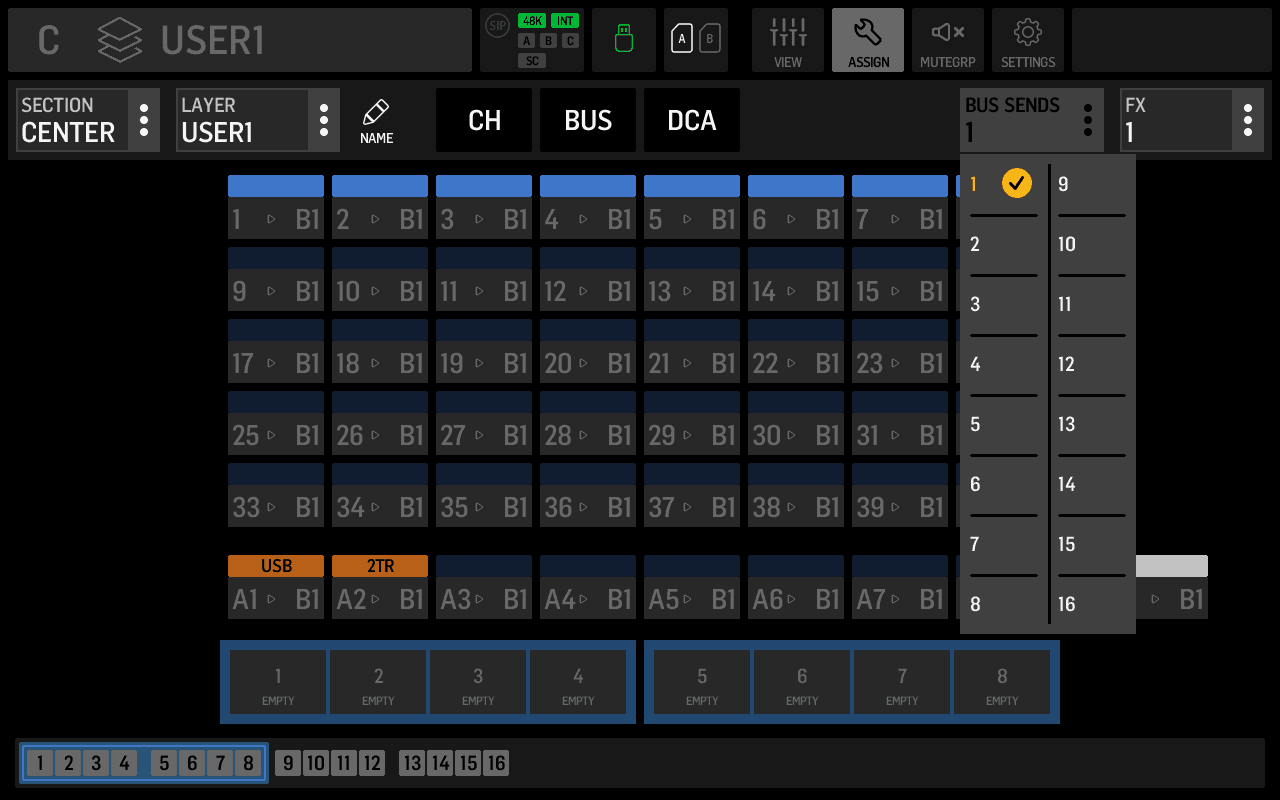
It's already an improvement to rearrange and add channels, bus-masters, matrixes, and mains, but the WING goes even further: You can assign bus sends to faders. Bus sends are individual contributions from one channel to one bus. Generally, you access these individual contributions with the sends-on-fader mode. If you frequently need certain combinations, this can be a huge workflow improvement. For example, you could assign the lead singer's mic's contributions to his wedge to a dedicated fader on the right bay. To assign a bus send to a fader, tap the BUS SENDS drop-down on the right side of the screen and select the bus you want. The channel grid will now show all channel's contributions to this bus-master.

Assigning FX parameters
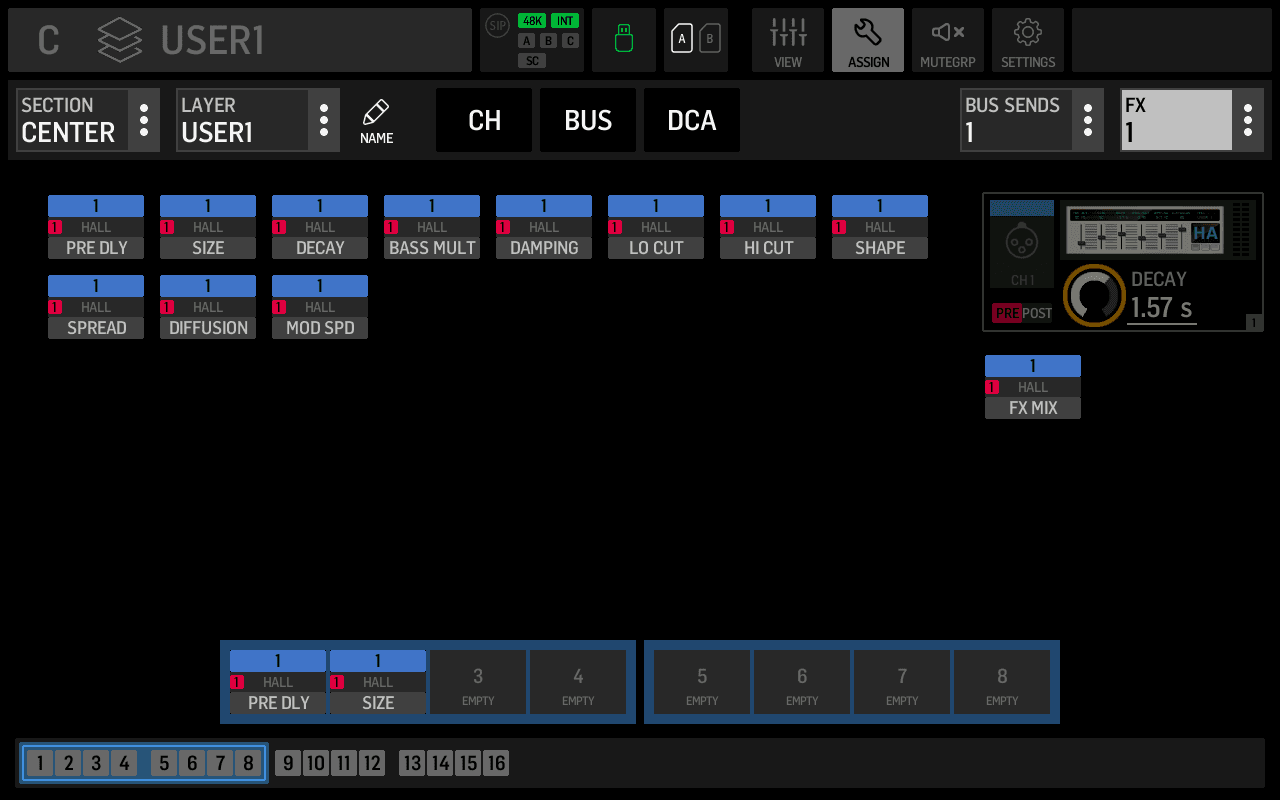
The WING already offers a dedicated custom controls section that most engineers will most likely prefer for FX parameters. With firmware version 1.06, you can now assign FX parameters to faders. To assign an FX parameter to a fader, tap the FX drop-down and select the FX processor you want to control. You'll see all the FX parameters listed. Tapping the FX processor's icon or main parameter and control directly under the icon will open the FX detail page. For example, if you want to assign the decay value of a hall effect, you have to use the decay box on the screen's left side instead of the rotary control.
